


17th Century English Cottage Bedroom Makeover | Before & After

It’s been a long time coming, but we have finally finished our bedroom and are able to share it with you! When we moved in, our bedroom was dingy, dark and depressing. It also came complete with a very small en-suite bathroom that not only took up half the room, but was barely useable. Over a year later, a ripped out bathroom, floorboard restoration, lots of paint and organisation, we have finally finished. It makes me so happy to spend time in this room, to cuddle up in bed with Alex and Roxie, to read a book with a cup of coffee in the morning, and to choose my outfit from our new open wardrobe. You can watch the full transformation video linked at the bottom of this blog post to watch the entire makeover process, but like I did for our bathroom, I wanted to write the details down in a blog post for you to see! All the items available online are linked at the bottom of this blog post.


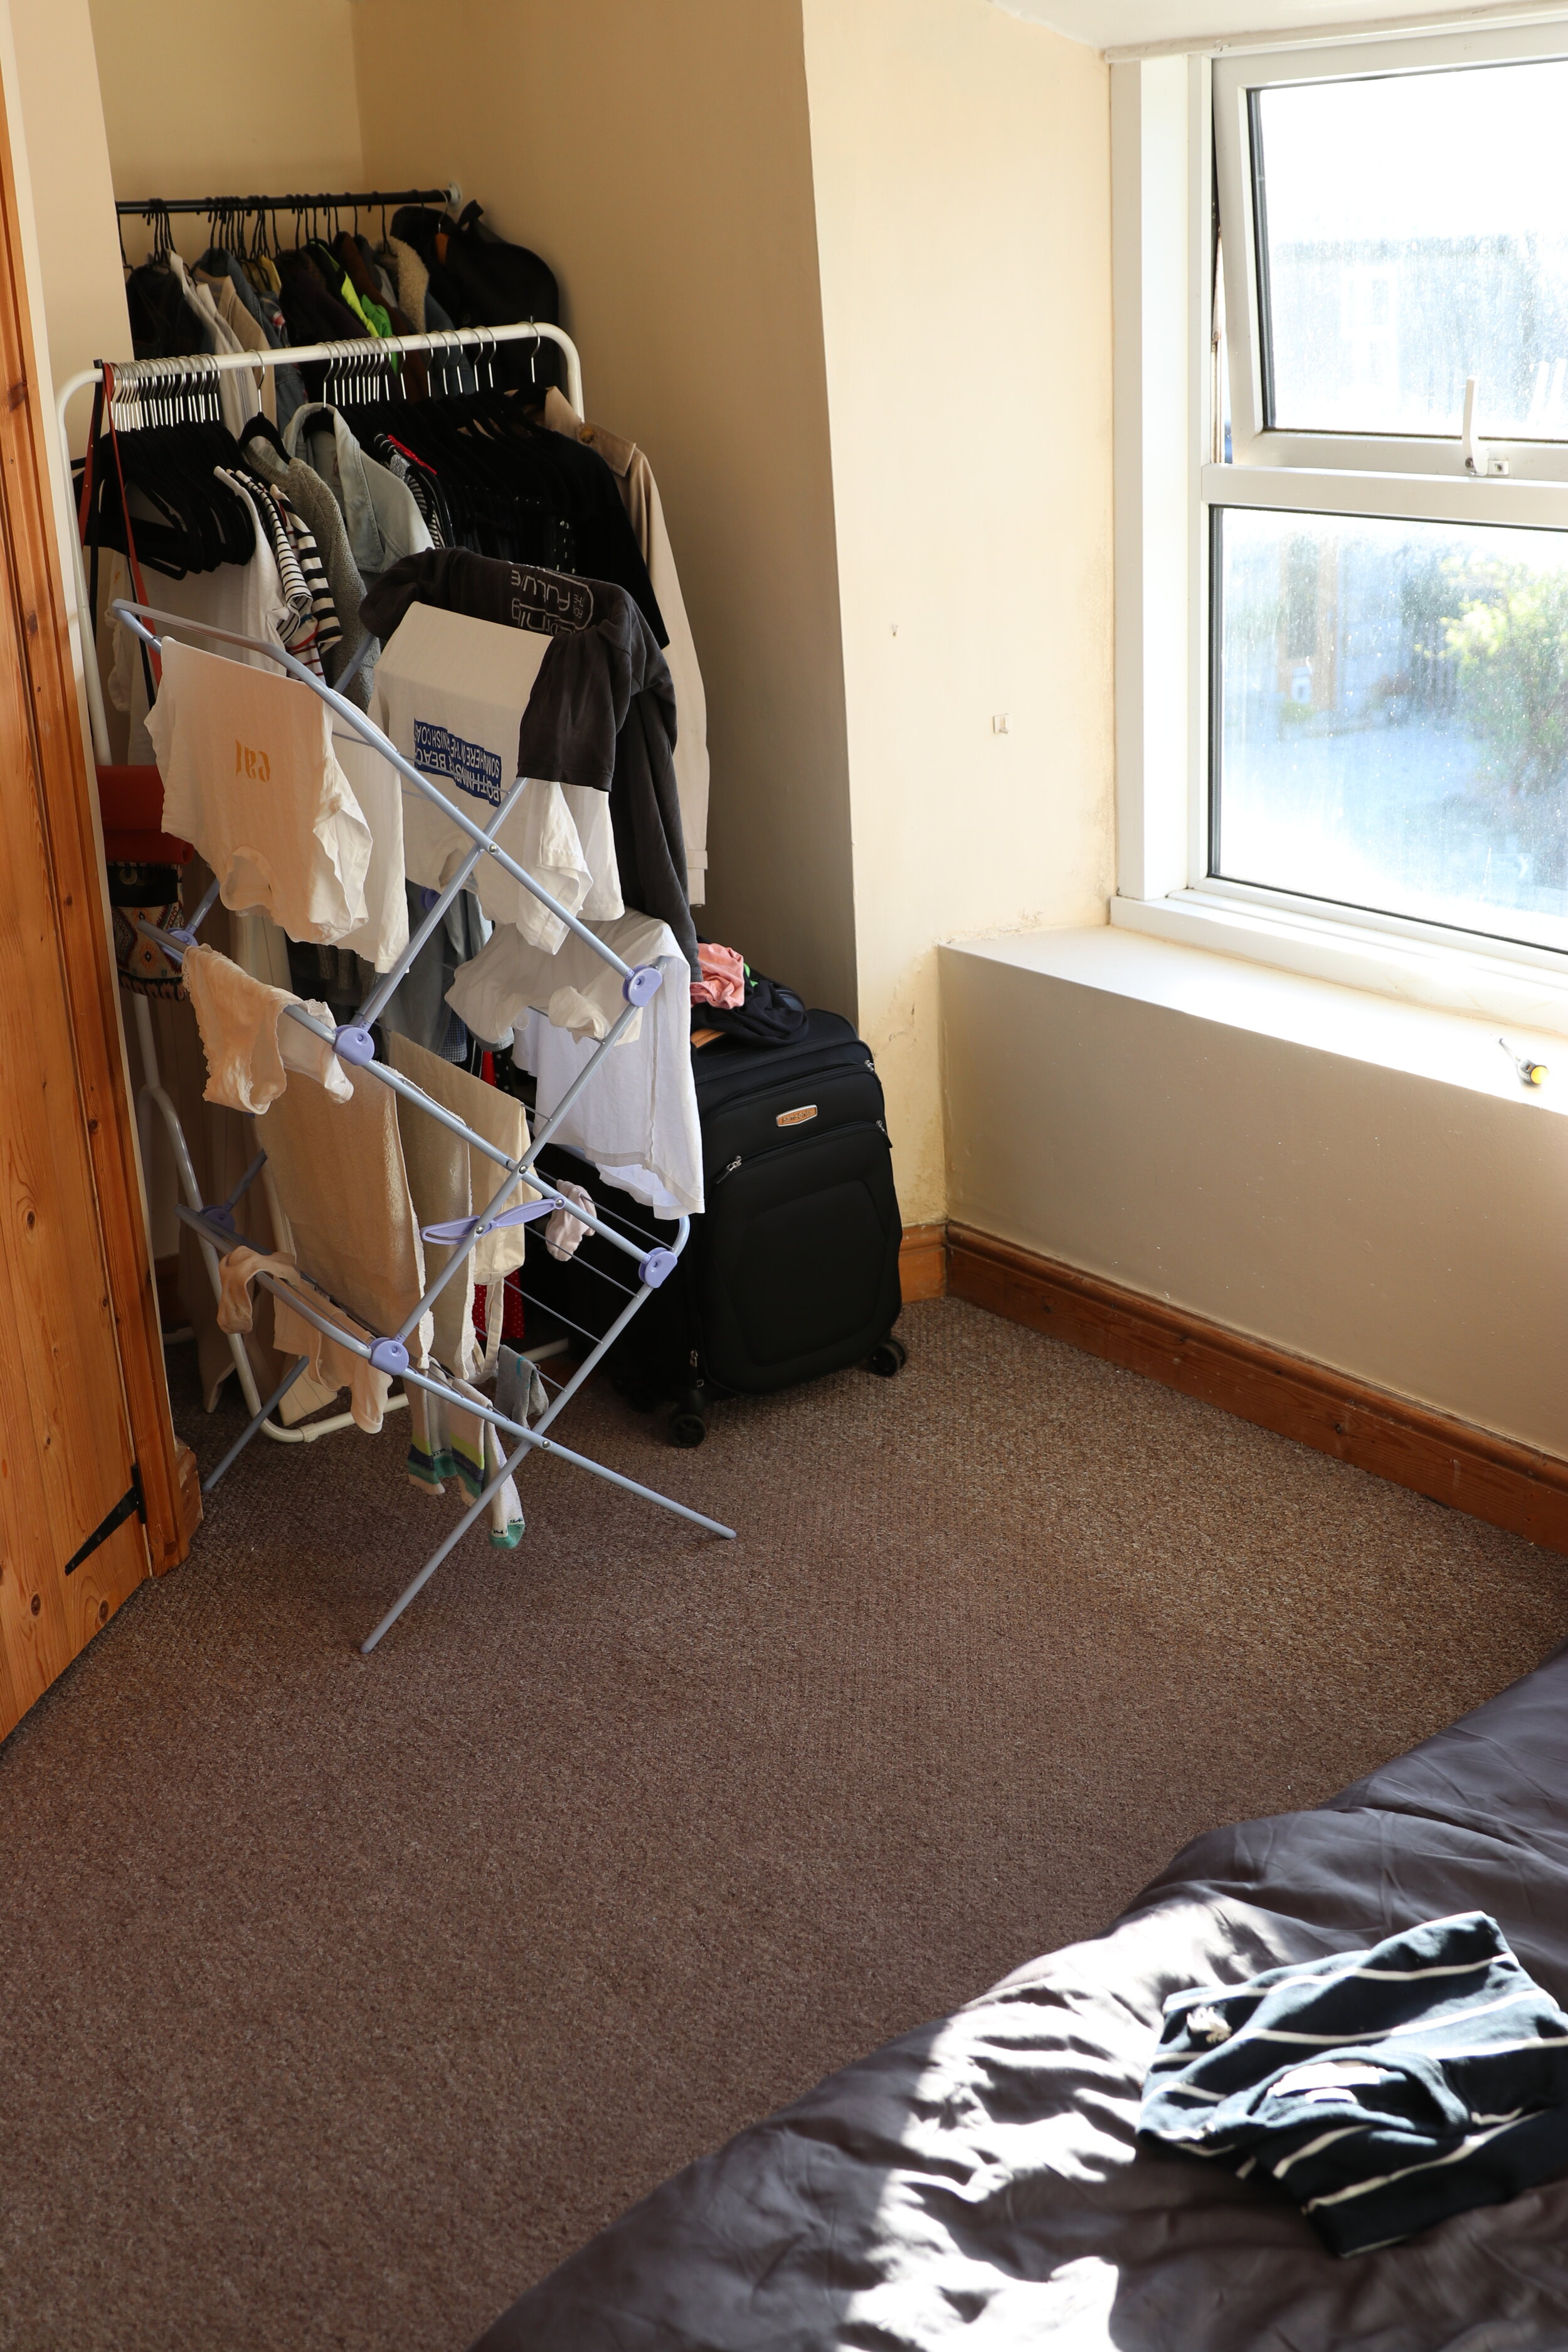

Let’s go back to the start. The room had no warmth, character or personality. Like a lot of the rooms in the house, it had been a long time since these rooms had seen much love. From the magnolia crusty paint, to the muddy-coloured carpets and tatty doors, it needed some TLC. As I touched on above, there was a pretty bad en-suite in the master bedroom when we moved in. It was very small and came with a charming saniflo toilet, shower that you could barely lift your arms in, a sink so small it was a struggle to wash your hands or clean your teeth, and a door that touched your knees when doing your business. It had to go. Not only would we gain more space in our master bedroom, but we’d also gain a full sized bathroom upstairs. It was definitely the best decision, and we couldn’t be happier when we saw it being ripped out.


Midway through the en-suite removal
Once the bathroom was gone (see video below), we gained a much clearer picture of the space. It immediately felt bigger and we could start to have a vision for the room. Early on we had all the windows in the house changed and sash windows installed, and this made a huge difference to the feel of the house, including this bedroom. We learned from the windows the worth of spending some money to bring this cottage back to life, so we also decided to splash the cash to restore the floorboards hidden underneath the carpets. While we had less success in some of the other rooms upstairs (see our floorboard makeover video linked below for all of the drama), the master bedroom had stunning Victorian floorboards that were able to be brought back to life. I have always dreamed of having original floorboards in my home, so this was one of the most exciting discoveries and makeovers so far during our renovation process.
After giving it a go in the spare bedroom on our own by hiring a sander, we learned from our mistakes to hire professionals to complete the job. As I mentioned the floorboards in this room were salvageable; instead of (potentially) original to the house and close to 400 years old and ridden with lots of woodworm (like they were in the spare bedroom and bathroom), these were Victorian and therefore in much better condition. The guys did a great job cleaning them up and polishing them to their former glory. The warm pine was a starting point for so many decorating decisions later on, and my dreams for floorboards in my bedroom had been fulfilled.


The next big job was the paint the room, the door and the skirting. I love a calm and bright bedroom, so we kept it simple and went for an off white paint for the walls (White Mist by Dulux). It took a little longer to finish than usual, mainly due to the large area of plaster left over from removing the bathroom. It took many layers and many hours, but once finished, the room was a beautiful blank canvas for us to work on. The white paint made the floorboards and windows stand out, and brought so much light into the room. I couldn’t quite believe how much brighter this room was once we painted it (the first before and after photos in this post show this perfectly).
Between the room being painted and now a lot of time elapsed. In fact we finished painting the bedroom in June 2019, and nearly a year later are sharing this with you. We partially got distracted with making over the living room (coming soon), and other rooms of the house, and partially got renovation fatigue. We had finished the main elements of making over this room, but we honestly ran out of energy to actually decorate and make it how we wanted it. I want to emphasise this point as it can be hard renovating a house all at once and doing lots by yourself. Life happens (I was in the middle of writing a book at this point for example), we were renovating other rooms in the house at the same time, and we simply ran out of inspiration and motivation to finish the job. Another part of this was taking our time to source furniture, figure out our style, and piece it together. As you may already know I like to buy things secondhand and locally when and where I am able, and this process can take a bit longer. I also want to be very considerate when I do buy items new, to make sure they’re gonna be around for the long haul. But it is so worth it when you find treasures for a fraction of the price, furnish your home with pre-loved pieces and find decorations you’ll keep forever. Yes ideally we would have our bedroom done straight after painting it, but finishing the job can sometimes be the hardest part.
Some other finishing touches that happened in between painting the room and now, was installing shutters and finishing off the skirting boards. We went back and forth for months on whether to get shutters or not. They are an expensive option, which is why we took so long to go ahead with it. However, curtains were problematic in various rooms of our house due to the shape of the windows, while blinds weren’t much cheaper (they would have needed to be custom made to the unique sizes of each window), so we ended up going for what we wanted in the first place. I have always loved plantation shutters, and the dappled light they create in a room is priceless to me. They were installed for us by Shuttercraft who did an incredible job. And the very last DIY job was the skirting boards. Alex re-used the skiritng boards from the bathroom to finish the part of the room where the en-suite was removed, and underneath one of the windows where there just wasn’t any to begin with. They’re not perfect because we were reclaiming skirting from a different room, but it saved costs, was a more sustainable option, and just adds to the character of the room.


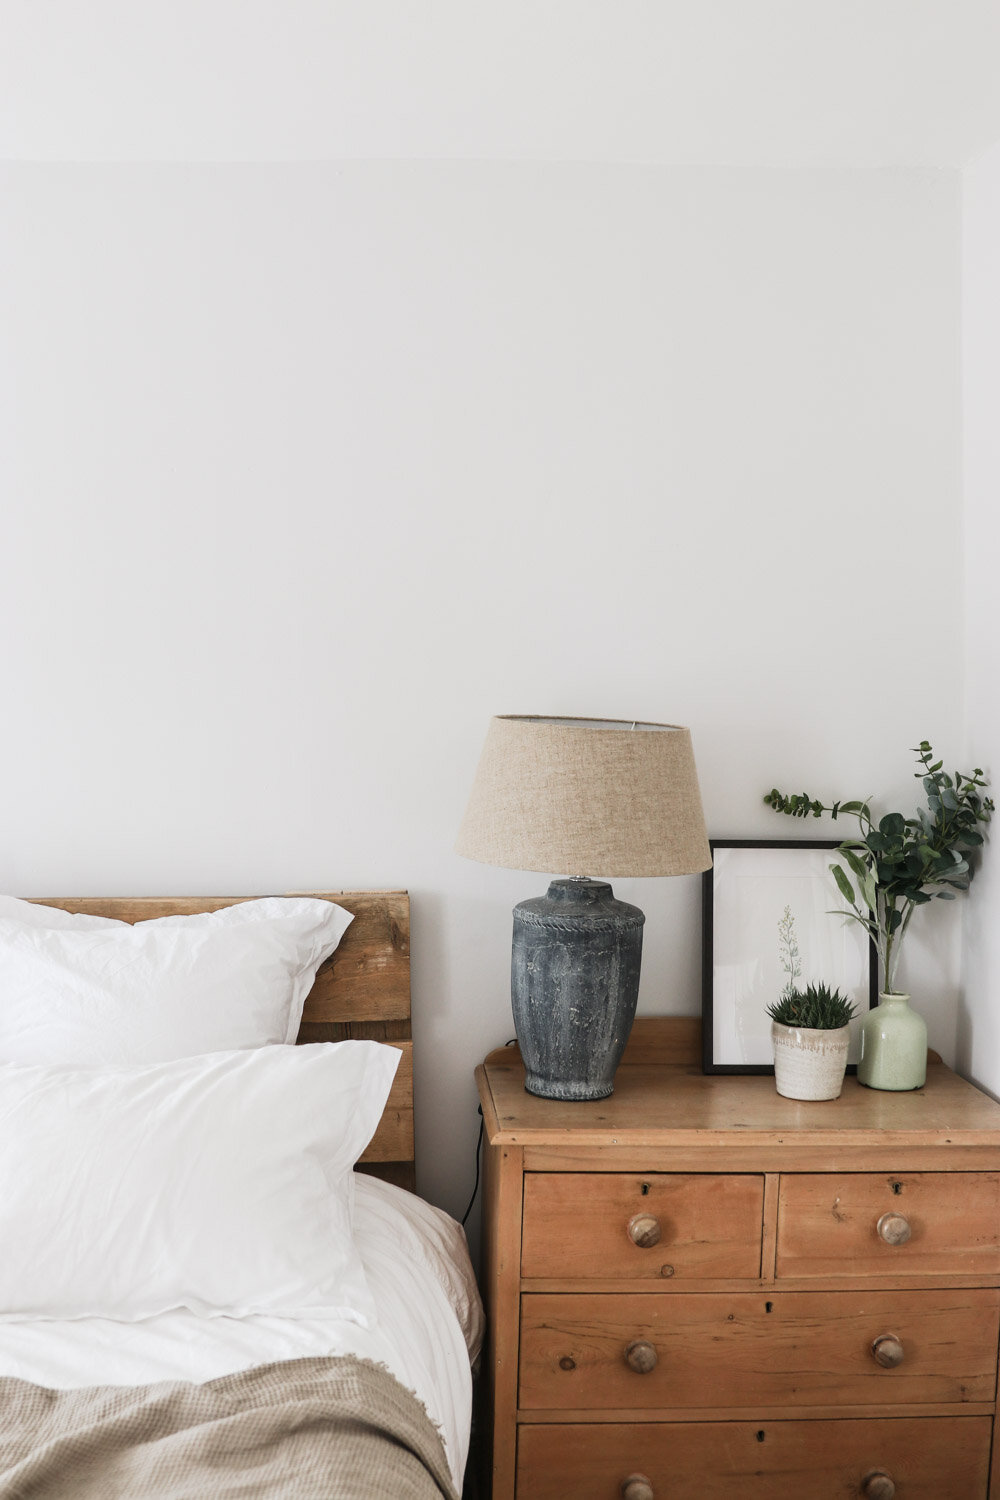
So now let’s get down to the styling, starting with the bed. I came across a company run by a guy in Cornwall called Rustic Kernow on facebook marketplace. He makes beautiful furniture from reclaimed wood, and his beds caught my eye. We had bought a bed when we moved in really cheap (big mistake don’t do this), because it’s all we could afford at the time and we didn’t want to sleep on the floor anymore. I thought the bed was a total bargain at £195 for a king size bed custom made with solid wood. Delivery and installation was £50 making the total £245. He made it and delivered swiftly for us, and we fell in love! It matched a bench we had purchased on facebook marketplace for £30 for the bedroom perfectly and was a stand out piece for the bedroom. I can’t recommend his services enough, as he also made us some furniture for our living room which we equally adore.
We finished the bed off with some beautiful fluffy faux-down pillows, crisp white sheets and a natural-toned linen throw from Etsy. We swapped out our original bedside tables, that were far too small compared to the bed, for a vintage stool from facebook marketplace (£20) that was in our spare bedroom (which now has our old bedside tables). We also moved our beloved vintage Victorian chest of drawers (also purchased from facebook marketplace - a pair of them for £120) to the other side of the bed. Sometimes all it takes is a switch around of furniture to make things right, rather than buying something completely new. We love the bedside tables in the spare bedroom (makeover coming soon!), and the chest of drawers works so much better next to the bed than where it was before on the other side of the room.
On my side I have an amazing sunrise alarm clock (£26) that we recently purchased, some dried flowers in a recycled jar and a rose quartz I’ve had for years. On Alex’s side we found a spot for this lamp that was originally purchased for our living room from Cox & Cox (£95), but sadly didn’t work. Next to the lamp is a beautiful illsutration from one of my favourite local shops Botanical Atelier (£40), a plant and some faux eucalyptus in a green pot that I’d collected from a few different trips to the shops.

Moving to the other side of the room, the transformation is huge. Without the bathroom we had space to make this our dressing area. We originally made plans to get a wardrobe fitted into the small alcove to the right of the room, but after browsing Pinterest we became inspired to make an open wardrobe. This unusual space is a recess from the old chimney breast, and potentially would have been cramped had we spent lots of money turning it into a wardrobe. We contacted the same guy who made our bathroom shelf for some more (Fester’s Industrial Look on facebook - £5 per foot and £5 for a steel bracket), and ordered some pipe and flanges from the same guy on Etsy we got our industrial toilet roll holder and towel rail from for our bathroom. These small details keep it modern, industrial and gender neutral, as I’m sharing this room with my partner. I couldn’t be happier with how it turned out as it adds some colour and dimension to an otherwise simply decorated room. We share this space for our hanging items, trousers and shoes.

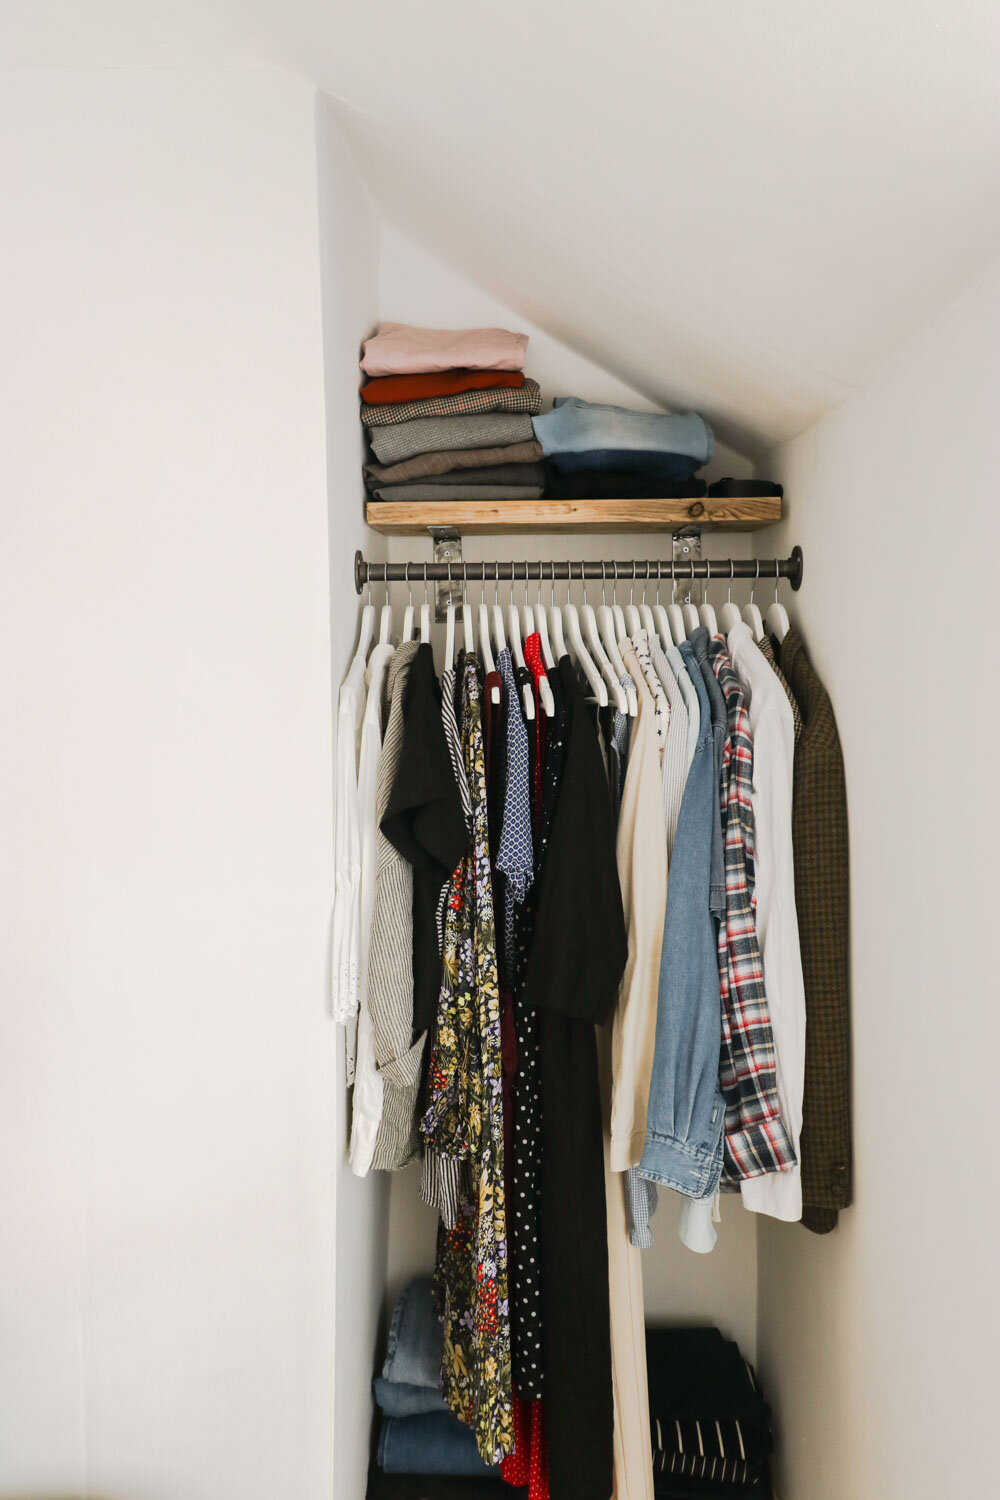
But don’t be fooled! This is not all of our clothing. We have under bed storage we picked up off facebook marketplace (of course) for only a tenner. One houses jumpers, the other Alex’s summer clothes and bike/gym clothes. The chest of drawers has all of our underwear, my gym kit and Alex’s t-shirts. Plus next door in the spare bedroom we have another wardrobe where we keep all of Alex’s suits, our smart shoes/heels, and my summer clothes (which I’ll switch out as soon as the weather heats up!)


Finally the dressing table (£75 from facebook marketplace) also houses clothes, and is where I keep all of my make-up, jewellery, watches and our sunglasses in one drawer, with my pjs and tops in the one below. I only go into so much detail about our clothing storage, as I know with these kinds of open wardrobes it can seem like people have a shop-front wardrobe that is perfectly curated. I don’t want to give off this impression as all the other bits are just carefully organised and hidden away!
But back to the dressing table; this was one of the first pieces of furniture we bought for the house, and was originally intended for our bathroom. I had plans to turn it into a sink unit, but with the final batbhroom design, it was too big, so it ended up in our bedroom instead. And I love it! On top we have some more dried flowers, my trusty mirror with a battery powered light and a basket with lots of scrunchies, lipbalms, handcreams and other beauty bits. Our washbasket was from Homesense years and years ago, the basket under the dressing table was from Willow and Stone in Falmouth, and the chair is another facebook marketplace find for only £5! Our large mirror is originally from IKEA (the Hovet mirror for £90) but we managed to get it from eBay for only £25 either just before or just as we moved into the house. Finally the rug is from IKEA (we got it for £80 but they seem to have upped the price to £99 now) and the ceiling lamp (which we changed out after making the wrong first decision) is from Cox and Cox (£65).

I am so pleased with our bedroom, as it feels like a peaceful sanctuary to come home to. It feels fit for purpose, while cosy and my style. Maybe if I lived alone it’d be a little more girly and vintage, but I think we’ve found the right balance for the both of us to enjoy. I’m so happy we managed to find so much secondhand, and hope I can inspire you to the same!
The only two things still on my mind for this room is a big painting above our bed, but I believe this will come to us in time. I don’t like to rush larger purchases or things such as paintings which I want to keep forever. So we’ll wait and see when it comes to us! And secondly we might change the radiator, or at least give it a lick of paint one day as it’s looking a little worse for wear.
The makeover of our bedroom took longer than expected, but it’s all part and parcel of renovating. I feel like we found the right balance between spending money while saving costs elsewhere. If you want to see the full makeover renovation in video format, then check out our bedroom makeover video linked below. And also make sure to watch through the renovation series on my channel to see the full updates as they happend! Until the next makeover!
(Everything not listed below we got secondhand or locally to us, where the product is no longer available i’ve linked to a similar product )
Fester’s Industrial Look Reclaimed Shelves
*This post contains some ad-affiliate links

